Back of the Box

We have been eating a lot of pad thai lately. This is a dish I didn’t even realize you could make at home until pretty recently, when my new friend Z. invited me over, ostensibly to talk about books and Astoria and my nascent business. The evening suddenly became much more delicious, when she and her husband hauled up dinner ingredients to their roof via an external dumbwaiter and made the best pad thai I’d ever eaten, in a wok, on a grill, while watching the sun set over Manhattan. It was truly a memorable evening.

image


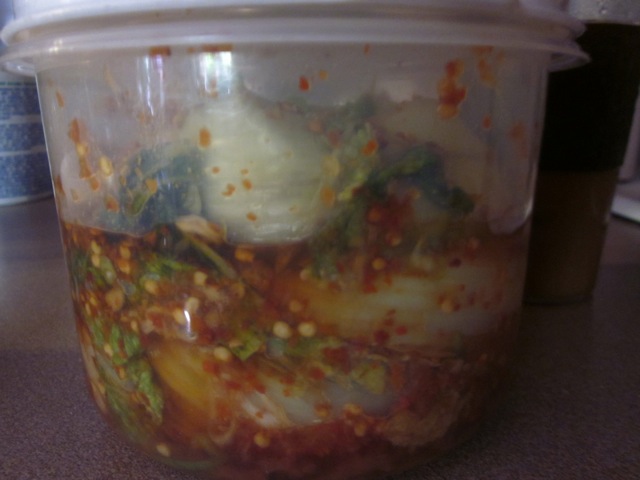
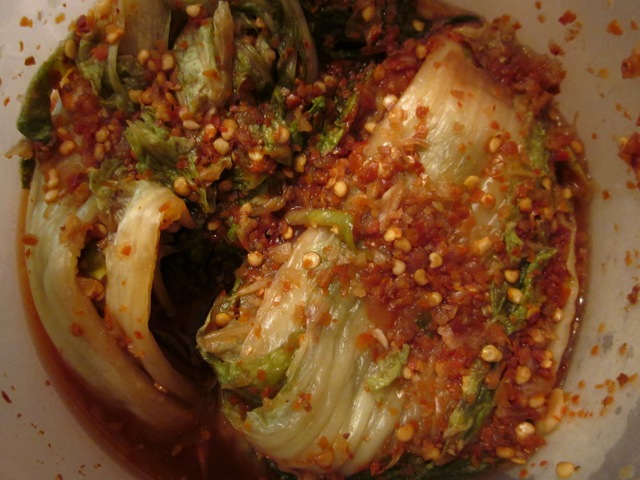
According to my calendar, that was last July. A lot has happened since then. I was laid off, my girlfriend moved in with me, we got married, and we signed a lease for our bookstore. We’ve been busting ass to get the store open as quickly as we can, which leaves less time than I would like for my regular kitchen meditation time (aka cooking elaborate dinners). Luckily, the early weeks of CSA deliveries inevitably have a lot of leafy greens that are best eaten in salads or with very brief cooking times. Mizuna, for example, and chinese cabbage.

Another recent news item from our household is that Connie had to have a root canal. The upshot of that is that for a while, at least until she gets a crown on the tooth, she’s got to stick to foods that are easy to chew. Which is how I found myself making pad thai twice in one week.

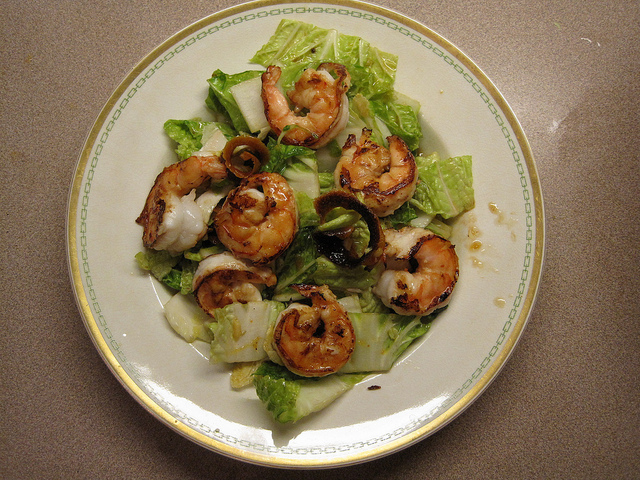
The recipe, which is derived from the back of the box of Annie Chun’s brand pad thai noodles, is astonishingly easy. Start by putting on a kettle of water. When it boils, pour it over the rice noodles in a big bowl, or a relatively solid tupperware container, and let them soak. While that happens, chop up some shallots or onions, garlic, some tofu or chicken or shrimp, and any asian greens you happen to like. Slice the greens very thin, so they’re only about as wide as the noodles. Then mix up a quarter cup of lemon juice, 3 tablespoons of sugar, 3 tablespoons of fish sauce, and a little crushed red pepper.

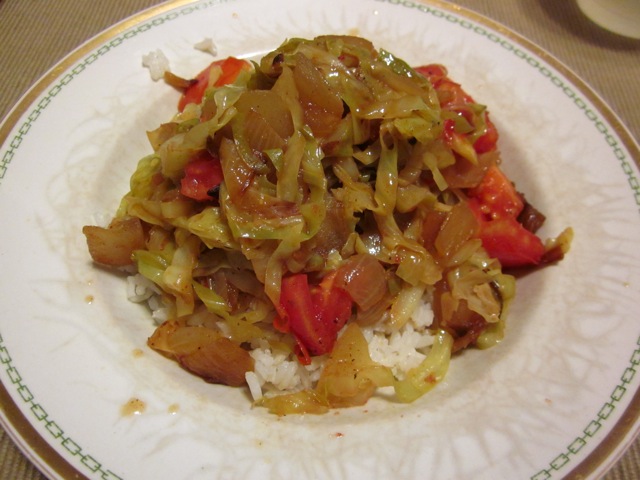
Heat up a wok over high heat, and add a little vegetable oil. Dump in the garlic, onion, greens, and whatever protein you’ve chosen. Stir fry them up until the greens are wilted, the onion is translucent, and the meat or fish (if you’re using it) is cooked through. If you’ve timed it right, the noodles will be soft by now. Strain them into a colander and transfer the contents of the wok into the bowl you were using to soak them.

Return the wok to the heat, add another couple of tablespoons of vegetable oil, and crack in two eggs. Scramble them up, and when they’re cooked, pour in the lemon juice/fish sauce combo and add the strained rice noodles. Stir everything together, then add the cooked veggies and a cup of bean sprouts. Turn off the heat and garnish with chopped scallions, crushed peanuts, cilantro or mint, and a squeeze of lime juice.

The result is a wok-ful of sweet/salty/spicy/sour noodles, easy enough to chew for even a patient recovering from dental work. I have a feeling this will stay in the dinner rotation even after Connie’s tooth is back in working order.

Kimchi Tacos

Img_2093

I don't have photos of the cooking process here, because I honestly didn't think it would turn out well enough to want to share with anyone. Swiss chard, Great Northern beans, my untested homemade kimchi, and some month-old corn tortillas. This was one of those dinners where I was very glad I wasn't feeding anyone else, because it seemed like such a potential disaster. But it was Monday night, and the week's delivery had just arrived, and I needed to use up last week's chard to make room in the fridge. I'd cooked up a pot of white beans the day before, and I had (have) this massive tub of kimchi, and a bag of corn tortillas that were leftover from C.'s birthday dinner (fish tacos & salmorejo). And a quarter of an avocado. "How bad could it be?" I thought to myself. "I mean, it could be terrible, but I'll be the only one who knows. And I can always just have a salad if it's totally inedible."

So I diced up the chard stems, and sauteed them in olive oil with a little garlic, and then added the chopped leaves until both were pretty tender. Then a few big spoonfuls of the beans, just to heat them through.

Then it was just a matter of heating up a few tortillas and assembling. I learned the second time around that it makes more sense to start with a lettuce leaf (good protection against the excess liquid from the chard, like putting peanut butter on both slices of bread & jelly in between to keep the bread from getting soggy). Then a scoop of the chard & bean mixture, a slice of avocado (absent in the photo below because I had finished it the night before), and some chopped kimchi. 

I'm more surprised than anyone that this was actually delicious. Though I'm still learning the proper way to heat up corn tortillas so they are soft and pliable and not dry and cracking. (For the record, that problem was evident even when the tortillas were freshly purchased, so I don't blame a month in the fridge.) Maybe if you crisp them up and do a hardshell taco? 

Swiss Chard & Kimchi Tacos
makes 10-12 tacos

10-12 small corn tortillas
1 bunch Swiss chard
1-2 cloves garlic
olive oil
1 cup cooked white beans
10-12 small lettuce leaves (or 5-6 large lettuce leaves, cut in half)
1 small avocado
Kimchi to taste

Cut the stems away from the leaves of the chard. Dice the stems and cut the leaves into thick ribbons. 

Peel and thinly slice the garlic. Heat a couple tablespoons of olive oil in a large skillet over medium-low heat. Add the garlic, and when it is fragrant, add the chard stems. Saute for a few minutes, until they start to get tender, then add the sliced leaves. Cook, stirring occasionally, until the leaves are tender. Add the beans, keep cooking until they are heated through, then remove from the heat.

Heat up the tortillas in the manner to which you are accustomed (I hear microwaves are useful for this). Place a lettuce leaf in the center of each tortilla. Add a spoonful of the chard & bean mixture. Top with a slice of avocado and as much chopped kimchi as you like.

Spice

Korean food is something I didn’t come across until I was an adult, living in Manhattan. When I finally tried it the first time, I fell head-over-proverbial-heels in love with bibimbop, at this tiny place on St. Mark’s that isn’t there anymore. That was maybe a foregone conclusion: I love a rice-based cuisine; I’m a sucker for anything that gets served in its own special dish; and when you factor in the egg that gets cracked on top at the very end, cooking at the table from the residual (and considerable) heat of the stone bowl, it is no wonder that I was smitten.

Even so, it took me a while to figure out where kimchi fit in my life. I have only gradually acquired a taste for spice in my food. Although I grew up eating sushi, even the tiny smear of wasabi in between the piece of tuna & the ball of rice was sometimes more than I could take in my younger years. While my dad would literally drink hot sauce straight from the bottle, I limited my salsa experience to “mild,” and my Indian food to chicken korma for many years. But tastes change, palates expand, often as a result of falling in love with someone with a passion for all things spicy and fermented, and especially things spicy AND fermented.

Kimchi, for those unfamiliar, is a spicy fermented cabbage, used as a condiment, soup base, fried rice ingredient, and, if you’re C., an after-dinner snack. It’s available pre-made in Asian markets, and often in health food stores, but if you find yourself overloaded with Chinese/Napa cabbage, it’s pretty easy to make yourself. I got a couple of basic recipes from friends, and some very valuable pointers (to wit: “disposable gloves are key, bc that shit will stank up your hands like no one’s business”), made a quick run to an Asian market for sweet rice flour, and got started.

First, cut the cabbage in half.

Img_2057

Take a handful of kosher salt and sprinkle it between each layer of leaves, paying special attention to the thicker base end. Put the cabbage in a strainer or a bowl and let it sit for a few hours, turning once.

Img_2058

While that’s happening, you’ll have plenty of time to prepare the sauce. It starts with ground red pepper (which you can also buy at an Asian market, or you can put crushed red pepper through the Cuisinart for a few pulses), fish sauce, minced onion, garlic, and ginger. 

Img_2064

Then simmer a little sweet rice flour in water into a kind of porridge. Add a little sugar, then let it cool, and add it to the pepper/onion/etc. mixture. Stir it up, adding sliced scallions.

Img_2065

Once the salt has had its effect on the cabbage, drain it, rinse it thoroughly, and drain again. Then (here’s where the gloves come in handy) spread the paste between each layer of leaves. Mush the cabbage halves together, and put them in an airtight container.

Img_2066

Let it sit for a couple of days, venting 2 or 3 times a day to make sure the lid doesn’t blow off. By the end of the second day, you’ll see bubbles in the liquid the cabbage is sitting in. This is the sign that the fermentation is working.

Then transfer to the fridge, and basically you’re good to go then, though traditionally you wouldn’t eat it until another 2 or 3 days go by.

Img_2071

Now you just have to figure out how to use the stuff. But don’t worry, it lasts practically forever, so there’s no need to rush to eat it all right away. C. will be coming to the city for several weeks in July & August, and I’m sure she’ll help me come up with some things to do with my stash.

Img_2072

Kimchi
adapted from Maangchi

1 1/2 lbs Chinese cabbage
1/4-1/3 c kosher salt
1 1/2 Tbsp rice flour
1/2 c water
3/4 Tbsp sugar
3/4 c ground red pepper
3-4 Tbsp fish sauce
3-4 Tbsp minced onion
3-4 Tbsp minced garlic
1/2 tsp minced ginger
1-2 scallions, thinly sliced on the diagonal

Cut the cabbage in half lengthwise, and slice into the core at the base of each half (but not through the leaves). Sprinkle the salt onto the cabbage, between each layer of leaves. Set the cabbage in a bowl or a colander and let it sit for 3-4 hours, turning once.

Simmer the rice flour with the water for a few minutes, until it thickens into a porridge. Add the sugar, cook another minute, and then remove from the heat. Let it cool.

Combine the red pepper, fish sauce, onion, garlic, and ginger in a bowl. Add the cooled porridge and the scallions. Stir together to form a thick paste.

Drain the cabbage, rinse off the salt, and drain again. Put on rubber gloves and spread the pepper paste between each layer of leaves. Put the cabbage halves in a container with an airtight lid and leave at room temperature for 2 days. Open the lid 2-3 times a day to release the air.

After 2 days, transfer to the fridge. You can eat it after another 2 days.

Pie for Dinner

I would like to pretend that this mushroom cabbage galette from Deborah Madison is some kind of health food. I mean, it’s cabbage! And mushrooms are good for you! And you can totally use low-fat sour cream and even I will not scoff. But let’s not kid ourselves. Galette = pie. Plus, Smitten Kitchen has made this before, and you know how she feels about healthy food. And there’s the bit at the end where you dump a load of melted butter on top of everything. So let’s abandon these virtuous fantasies and get with the cooking.

Start with the dough–I went with a yeasted tart dough (much simpler than it sounds), though DM suggests an alternative galette dough that’s basically just pie crust. 

While it rises (or chills, depending on what kind you’re making), saute a diced onion and some sliced shiitake mushrooms, with thyme, tarragon, & dill in a good amount of butter. 

Img_1685

When they’re soft, add a big pile of thinly sliced cabbage, a bit of salt, and a half cup of water. Cook, covered, until the cabbage is tender.

Img_1686

At this point, the recipe instructs you to add water and then raise the heat to cook it all off, ending with a relatively dry pan of veggies. I would recommend NOT adding any more water–just cook off whatever is left in the pan when you take the lid off. Turn off the heat, then stir in a pile of chopped parsley, a chopped hard-boiled egg, and some sour cream. Splash in a little vinegar (white wine is fine if you don’t have tarragon, as called for) and season with & salt and pepper.

Img_1687

Set the oven to 400F. By this time, your dough should be properly risen or chilled. Roll it out into a big, thin circle. Another instruction I don’t entirely agree with: place the rolled-out dough on the BACK of a sheet pan. Then pile the filling into the center, in a circle about 7 or 8 inches across, and fold the edges of the dough up over it. Brush the whole thing with a couple tablespoons of melted butter and bake for 25-30 minutes. 

Img_1688

The reason I would suggest putting the galette on the normal side of a sheet pan can be seen above. If you are not 100% expert at rolling out dough without holes; if you were not 100% thorough in making sure all the water was cooked out of the filling; and if you are maybe a bit sloppy in brushing on the melted butter: all of these are reasons to want a pan with sides. But guess what? I know who cleans the oven.

Img_1689

And your galette will not suffer from it, even if your oven does.

Img_1690

The galette gets served with horseradish sauce. You can probably buy some, or make it yourself with a mixture of sour cream, grated horseradish, chives, some sugar, and a tiny bit of salt & white wine vinegar. 

Spicy Hippie Cabbage

Remember last summer when I finally found a cabbage recipe to get excited about? (A non-cole slaw recipe, I mean.) Well, we made that the other week, and it was pretty awesome. And then I got another head of cabbage, and no longer had any spare oranges in my fridge, so I had to branch out. After rooting around in my stash of cookbooks, I settled on a recipe for Cabbage with Indian Spices from the hippiest book I own*, Farmer John’s Cookbook: The Real Dirt on Vegetables (aka, the one with the dude in an orange feather boa on the cover). I used the heirloom variety we got, Early Jersey Wakefield, but any kind will do. 

Img_0597


In addition to a pound of cabbage, you’ll need quite a lot of onions, a big tomato, fresh ginger, turmeric, cayenne, and coriander. Chop the onion and saute in vegetable oil over medium-high heat, with some minced ginger and a hot pepper if it suits your tastes. I used dried, because that’s what I had, but in any case you want it whole (or halved lengthwise if it’s fresh), not chopped up. Cook until the onion starts to brown, 15-20 minutes.

Img_0598


Then in goes the shredded cabbage, the spices, and a few tablespoons of water. Stir it up, and simmer, covered, about 10 minutes.

Img_0599


Then the tomato, chopped (and peeled, if you have more patience than I do), and a little salt. Cook another 5 or 10 minutes.

Img_0600


Serve over rice, after removing the hot pepper. Ideally basmati rice. My cabinets usually have a very diverse selection of rice, but this day, basmati wasn’t available, so I did long-grain white rice cooked with a bay leaf and called it a day. A most delicious day, at that.

Img_0601


*That is a lie. The hippiest book I own is Rise Up Singing: The Group Singing Songbook.

A Cabbage to Call My Own

I believe I have mentioned that we get a lot of cabbage from Stoneledge. Like, a LOT a lot. They grow regular green cabbage, bok choy, an heirloom variety called Early Jersey Wakefield, and Napa cabbage. I spent a good part of last summer hunting down as many recipes as I could find to use up the stuff. Good old Smitten Kitchen has an extensive stash of recipes. So does the Martha Rose Shulman, covering both green and red with multiple options. And I do love me some cole slaw. But somehow I never found what I would call a go-to cabbage dinner, one of those dishes where I HAVE to put the leftovers away immediately because otherwise I’ll eat them all, straight out of the pot, just standing in front of the stove.

But as of tonight, I think that problem is solved. Ladies and gentlemen, I present you with Seared Orange and Cabbage Salad, courtesy of The Arrows Cookbook: Cooking and Gardening from Maine’s Most Beautiful Farmhouse Restaurant.  Adjusted slightly for what was on hand, and served with seared shrimp.

I’ve been thinking a lot about serendipity this week. (This is relevant, I promise.) I had extra dried orange peel from the aioli, and I wasn’t quite sure how it would ever get used (except if I wanted to make more of the same). And then I stumble across this recipe, which reminds the cook that using dried orange peel is a classic technique in Chinese cooking. How convenient! I still had one of the oranges (minus the peel), and so all I needed to buy was shrimp and chile paste, though I probably could have been good with a bit of my sriracha stash.

Media_httpfarm5static_blidq

So first off, quarter the cabbage–2 small heads, or one large one–core them, and slice them into inch-wide strips. Dump all the cabbage in a bowl with a teaspoon or so of salt, and toss together. Then peel your orange (the recipe actually calls for fresh, so don’t worry if you don’t have a stash of dried), and juice it.

Media_httpfarm5static_fbdfp

Then the cooking, which is frankly minimal (another reason this recipe is a keeper).  Heat a bit of vegetable oil in a very hot saucepan, and add the orange peel. Stir “vigorously,” to keep it from burning.

Media_httpfarm5static_aaffs

When they’ve started to color, lower the heat and add a clove or two of garlic, chopped finely. Stir some more, until THAT starts to color, and then add the orange juice, a quarter cup each of rice vinegar and sugar (or, you know, agave nectar, if you’re a hippie like me), and a tablespoon each of finely chopped ginger, chile paste (sweet or spicy–your choice), sesame oil, and soy sauce.

Media_httpfarm5static_qlfbm

Raise the heat again and bring it to a boil.

Media_httpfarm5static_efbnj

Pour it over the cabbage and toss it all together. That’s really it. You can let it cool down as much as you like or eat it right away. I basically only waited as long as it took to pull the shrimp out of the fridge and sear them in the same pan I’d made the sauce in. 

Media_httpfarm5static_dkpvi

Beef or chicken or pork would probably be a wonderful addition, too. I think it goes especially well with shrimp, though, because the curls of the shrimp and the curls of the orange peels reflect each other in such an adorable way, you’d think I’d planned it. (If you really want that effect, make sure you peel the oranges latitudinally. I don’t think you’d get the curls with vertical strips.)

Media_httpfarm5static_wjvbc

Whatever You Like, Fried

Remember when J. was staying with me while she recovered from being run over by an SUV? Well, on the last night she was here, she made something called okonomiyaki for dinner. It is a kind of Japanese snack food, a cabbage pancake. The word, J. told me, translates roughly to “Whatever you like, fried,” which is fine by me.

Traditionally, you bind the chopped cabbage together with flour, dashi stock, egg, grated taro root, sweet potato flour, bonito flakes, and whatever else you like. You can mix in meat, shrimp, other vegetables, noodles…the list goes on. Then it gets pan fried with a few pieces of bacon on top (they will finish cooking when you flip it) and topped with bonito flakes, okonomiyaki sauce (sweet, tangy, brown, ineffable), and mayonnaise (ideally Kewpie brand*).

So this week, M. was coming over for dinner, and we had to figure out something interesting to make. I still had that half a head of cabbage tucked away in my vegetable drawer, and she didn’t seem put off at the idea of making something I know very little about. So we gave it a go, working very loosely from this Okonomiyaki recipe (cookies required, and not the good kind) from Just Hungry. For the record, M. is not only a charming dining companion, but also very handy as sous chef and staff photographer.

Media_http4bpblogspot_yefst

(The shots that are way overexposed are the ones I took).

Media_http3bpblogspot_faoow

My version still needs to be tweaked. I made the (probably novice) mistake of making one giant pancake instead of 2 smaller ones, and it sort of fell apart when we flipped it. That could also be due to the fact that I have yet to have that particular pan replaced under Calphalon’s amazing lifetime warranty. I will also be braver next time and buy some taro root, and maybe even make some dashi instead of just using water. And the ratio of cabbage to batter could use some adjustments, probably. I’ll update this next time I try it, but it’s too delicious not to share right away:

Totally Inauthentic Okonomiyaki

1/4 c flour
1/4 c + 1 Tbsp water
3 eggs
4 oz sweet potato, finely grated
1-2 Tbsp soy sauce
1-2 tsp fish sauce
Pickled ginger, chopped, to taste
2 c chopped cabbage (about 1/4 head)
2-3 scallions, chopped
4-6 slices Canadian bacon (or pork belly, or whatever)
vegetable oil
mayo
okonomiyaki sauce (for sale in Asian markets, or there are any number of recipes floating on the interwebs)
bonito flakes

Whisk together the flour and water, then mix in the eggs, grated sweet potato, soy sauce fish sauce, and ginger. Add the cabbage and scallions and mix it all together.

Media_http1bpblogspot_ygwie

Heat a skillet over medium heat and drizzle in a little vegetable oil. When it’s hot, pour in half the batter and top with a few slices of the bacon (photo shows 1 large pancake).

Media_http2bpblogspot_zjhjl

Cover and let it cook for a while, until the egg has started to set a little. Flip and cover again until it’s cooked all the way through. Repeat for second pancake.

Media_http3bpblogspot_dhxpp

Drizzle with sauce and mayo, and sprinkle some bonito flakes on top.

Media_http2bpblogspot_fzhtq

We also made this Italian Parsley and Beet Salad from Gourmet. It is an absolutely gorgeous dish, but not as flavorful as we’d expected. It takes ages and ages to julienne the beets when you have lost the julienne blade for your mandoline, and your hands wind up stained red for a day. But it still takes less time than roasting beets whole…

Julienne a pound and a half of beets.

Media_http1bpblogspot_bgnzr

Mix in a quarter of a red onion, sliced very thinly.

Media_http3bpblogspot_vfxpg

Add a cup and a quarter of chopped parsley, and toss with the lemon/orange/olive oil dressing (we suspect there should be more of that than the recipe calls for).

Media_http1bpblogspot_bvgvi

Toss all together and let it marinate a little.

Media_http3bpblogspot_yjegb

Serve with ricotta cheese.

*Yes, Lindsay, Kewpie makes mayonnaise. I didn’t know, either. The bottle even has a little baby embossed on it, though I hadn’t noticed until M. pointed it out.

Take Two

So I’ve already made this one, and even talked about it quite extensively, but this time I’ve got visual aids.

To rehash, for those of you just catching up, this is the Crispy Black Bean Tacos with Feta and Cabbage Slaw from Bon Appétit, which first came to my attention through Smitten Kitchen’s post about it. This is one of those recipes that falls onto the short list of Meals That Are Quick, Healthy, and Don’t Feel Like Cheating. (The complementary list of Quick Healthy but Cheating Meals includes things like Leftovers + Lettuce = Salad, and Omelets with Random Veggies.)

Take a quarter of a head of cabbage, core it, and slice very thin. Don’t bother with the mandolin. Mix it up with the juice from half a lime, a drizzle of olive oil, some salt, a shredded carrot, a good handful of chopped cilantro, and a couple of sliced scallions.

Media_http2bpblogspot_addid

Let it sit while you check out the view from the kitchen:

Media_http3bpblogspot_xceaf

(this is Mowgli pouting because I’m cooking and therefore not playing with him)

Media_http3bpblogspot_utkff

(and this is Mowgli suddenly VERY alert because he saw me whip out the camera. uh oh, the dog is starting to encroach on my food blog. he’s already taken over the bed, the couch, and most of the rest of my life. he’s even got his own blog, but clearly that’s not good enough…)

See? Look what happened while you were looking the other way: the slaw came together beautifully!

Media_http3bpblogspot_kjqvt

Now you take a couple of cups of black beans (a plain old can will do, drained and rinsed, but I had cooked up a pot the other day, and I think this is about 2 cups), and mash in a teaspoon of ground cumin. That’s right, mash it up, just short of refried beans consistency. You can get out the potato masher if you want, but a fork does the job perfectly well.

Media_http3bpblogspot_obiaz

Crumble up some feta, grab a couple of soft tortillas, and heat up your frying pan.

Media_http4bpblogspot_ergar

Drizzle in a little olive oil and toss in the tortilla, with a big spoonful or two of the bean/cumin mixture. Let it heat in the pan for no more than a minute, probably less, then fold it up, and cook another 30 seconds on each side.

Media_http3bpblogspot_xbeec

Transfer to your plate, and add the feta, some slaw, and as much hot sauce as you like. (I slathered the side under the slaw, which you can’t see, with the chili garlic sauce I made this past week. I’m getting kind of a taste for hot things–my dad will be so proud.)

Media_http4bpblogspot_cjorj

Fold it back up, and, look! It’s barely a half hour later, from start to finish, and you’re ready to veg out and eat a delicious dinner while updating your blog!

Media_http1bpblogspot_khuaf

A last note: the first time I made this, I cooked up all 4 tacos and froze #s 3 and 4, to be reheated at a later date. That was a mistake. It took significantly longer to reheat them than it would have to heat up a skillet and assemble from the prepared ingredients, and they didn’t taste nearly as good.

(Not Pictured)

Bon Appetit‘s Crispy Black Bean Tacos with Feta and Cabbage Slaw does not feed 4 people for dinner. But it is delicious. And if, like me, you are not ever going to buy a package of cole slaw mix, know that 1/4 of a head of cabbage, sliced thin, plus a carrot, grated, adds up to the same thing as 2 cups. (Or forget the carrot if you’re K. or S. and allergic. Either way.) And that whole wheat tortillas are excellent, too, though don’t follow their advice on timing, because three minutes in a hot oiled skillet = burnt tacos. And sriracha makes an excellent condiment to add some heat and flavor. And I followed Smitten Kitchen’s advice to double the cumin.

And then I admirably restrained myself from eating all 4 tacos in one sitting, so now I’ve got 2 wrapped in foil in the freezer, which I hope will be ok reheated in the oven… (It’s cabbage, not lettuce, so it should be fine, right? Right.)

Then also this week I made High Desert Blue Corn Muffins from Vegetarian Times, only not blue. I made these the first week of the CSA, too, but that was pre-blog, and I didn’t put in any pine nuts. Probably because I didn’t have any on hand, but if I’d remembered how good pine nuts are when they soak up a little oil, I would have made a trip to the store. They become kind of chewy instead of crunchy, and I just love them. This recipe is also another application of the kitchen-revelation that lowfat plain yogurt can pretty much substitute for buttermilk whenever you want.

I’ve frozen most of these muffins (it’s getting kind of crowded in the freezer), but I’ve still got loads more sage to use, so I might very well make another batch. Before I do, though, I should probably go out and buy a muffin tin. It turns out that the muffin tins I’ve used for the last [pause to do some quick math] six years belonged to one roommate or another. And now that I am living by myself, that’s something my kitchen is lacking. It also turns out, though, that it works perfectly well to set a dozen muffin liners in your Le Creuset 12 1/2″ rectangular baking dish, as long as you don’t mind trapezoidal muffins.

Cabbage Stir-Fry, Take Two

It is going to be insanely hot today and tomorrow here in New York City. If the forecast holds true, it’ll be our first 90F degree day since that one stupid weekend in April. So in the interest of not having to turn on my stove tonight, I cooked a lot yesterday. I pickled peppers, I baked shortbread (this time with summer savory, thyme, and lavender), and I stir-fried some cabbage. I made this dish once before, but seeing as how stir-fries require the more or less complete attention of the chef, and I do not often remember this fact, I was unable to photodocument the process. This time, I came prepared, and pre-chopped and minced and sliced, so everything was ready to be dumped in at the appropriate moment, and I still had time to snap a photo every once in a while.

The recipe, for Sweet and Sour Cabbage with Tofu and Grains, comes from one of my favorite sources, the New York Times Recipes for Health column. I followed it pretty much to the letter, but I suspect that it would also be very good with shrimp. I had Early Jersey Wakefield cabbage this week, but I think I made it with Napa cabbage last time. In both cases, it was made much better by the liberal addition of some chili garlic sauce, which is a piece of cake to make yourself if you have a Cuisinart.

The first step, as always with stir-fries, is to prep everything. Get out every ingredient, cut and mince what needs to be cut and minced. Because there are a lot of steps that read something like “add in the xxx and cook for 30 seconds, then add in the yyy, cook another minute, then add the zzz.” and those 30-second intervals don’t leave much time for “Ok, now WHAT do I need to be cutting for this next bit?” It has taken me, um, 6 years of owning a wok to learn this lesson.

Media_http3bpblogspot_cjbpv

For this particular recipe, first you cook up the tofu, in peanut oil and then with a little soy sauce.

Media_http1bpblogspot_visfa

Then remove that, and cook the onion slices.

Media_http2bpblogspot_vyvxm

Add scallions, garlic, and ginger, cook for a bit…

Media_http3bpblogspot_tchte

then a bit of cayenne and the cabbage.

Media_http1bpblogspot_iwayh

Cook a bit longer, then add some rice vinegar and sugar.

Media_http3bpblogspot_wgqic

Serve over bulgur wheat, with chili garlic sauce, or the asian hot sauce of your choice.

Media_http1bpblogspot_ixsyq

Better warm than cold, but still very tasty. And better cold than heating up the apartment when it’s 90F outside.