Kimchi Tacos

Img_2093

I don't have photos of the cooking process here, because I honestly didn't think it would turn out well enough to want to share with anyone. Swiss chard, Great Northern beans, my untested homemade kimchi, and some month-old corn tortillas. This was one of those dinners where I was very glad I wasn't feeding anyone else, because it seemed like such a potential disaster. But it was Monday night, and the week's delivery had just arrived, and I needed to use up last week's chard to make room in the fridge. I'd cooked up a pot of white beans the day before, and I had (have) this massive tub of kimchi, and a bag of corn tortillas that were leftover from C.'s birthday dinner (fish tacos & salmorejo). And a quarter of an avocado. "How bad could it be?" I thought to myself. "I mean, it could be terrible, but I'll be the only one who knows. And I can always just have a salad if it's totally inedible."

So I diced up the chard stems, and sauteed them in olive oil with a little garlic, and then added the chopped leaves until both were pretty tender. Then a few big spoonfuls of the beans, just to heat them through.

Then it was just a matter of heating up a few tortillas and assembling. I learned the second time around that it makes more sense to start with a lettuce leaf (good protection against the excess liquid from the chard, like putting peanut butter on both slices of bread & jelly in between to keep the bread from getting soggy). Then a scoop of the chard & bean mixture, a slice of avocado (absent in the photo below because I had finished it the night before), and some chopped kimchi. 

I'm more surprised than anyone that this was actually delicious. Though I'm still learning the proper way to heat up corn tortillas so they are soft and pliable and not dry and cracking. (For the record, that problem was evident even when the tortillas were freshly purchased, so I don't blame a month in the fridge.) Maybe if you crisp them up and do a hardshell taco? 

Swiss Chard & Kimchi Tacos
makes 10-12 tacos

10-12 small corn tortillas
1 bunch Swiss chard
1-2 cloves garlic
olive oil
1 cup cooked white beans
10-12 small lettuce leaves (or 5-6 large lettuce leaves, cut in half)
1 small avocado
Kimchi to taste

Cut the stems away from the leaves of the chard. Dice the stems and cut the leaves into thick ribbons. 

Peel and thinly slice the garlic. Heat a couple tablespoons of olive oil in a large skillet over medium-low heat. Add the garlic, and when it is fragrant, add the chard stems. Saute for a few minutes, until they start to get tender, then add the sliced leaves. Cook, stirring occasionally, until the leaves are tender. Add the beans, keep cooking until they are heated through, then remove from the heat.

Heat up the tortillas in the manner to which you are accustomed (I hear microwaves are useful for this). Place a lettuce leaf in the center of each tortilla. Add a spoonful of the chard & bean mixture. Top with a slice of avocado and as much chopped kimchi as you like.

Empanadas In My Freezer

Remember this?

Img_0079

Several months ago, I bought some lard to make bizcochitos for my New Mexican Cook Club. Looking back, it seems that I either didn’t take any pictures of that, or else they disappeared in one of my recent camera snafus. So you probably DON’T remember the lard unless you were at the dinner. Huh.

So let’s start over. I have this lard in my freezer. I used about half of it making these awesome cookies from a David Tanis recipe, but the remaining cup has been stashed away, waiting for me to come up with another use for it. 

Friends, let me tell you about empanadas. They are a Latin American stuffed pastry (the name basically means “things wrapped in bread”), usually shaped like a crescent moon, that you can fill with whatever you want. And they are much easier to make at home than I would have guessed. I found a recipe for the dough on the New York Times website, and just looked in my fridge for what to put inside.

To start, melt the lard for the dough. (You can also use vegetable shortening, but if you have lard in your freezer, why would you use anything else?) Add a little salt and some hot water. Then put some flour in a food processor (use the dough blade if you’ve got it), and pour the lard/water mixture through the tube while the machine is running. Dump the dough out onto a work surface, and knead it just until it comes together. Wrap it up, let it cool down, and stick it in the fridge for a half an hour or so. 

Img_0081

While it’s cooling, you can decide what you want to put inside. I had some garlic scapes,

Img_0085

a batch of pinto beans that either needed to be frozen or used, 

Img_0087

and a couple of heads of escarole.

Img_0086

I sauteed the garlic scapes in a little olive oil, added the pinto beans to heat them through, and then added the escarole, some salt, a little water, and a splash of vermouth. In retrospect, I should have chopped up the escarole more than I did. But in any case, once the escarole was fully wilted and the stew-like mixture had cooked down, I rolled out the dough as thin as possible and cut it into 6″ circles. A big spoonful of dough went in the middle of each one, and then I brushed the open area with an egg. 

Img_0089

(Note that you can fill these more than I did. I have a bad habit of overfilling things like omelets, tacos, crepes, burritos–anything that gets wrapped up–with tragic results, but it turns out that these puff up a little when they’re baked, which creates more room inside.)

Fold over, and crimp the edges firmly with the tines of a fork. Now, you can fry empanadas, but frying is often more trouble than I feel like going to, so these ones got baked, at 400F, for 15 minutes, turning over after the first 10.

Img_0090

So now, instead of a tub of lard in my freezer, I’ve got a Ziploc bag of empanadas. And instead of coming home from a family vacation to find a bag of rotting escarole and some rancid pinto beans, I came home to a delicious pre-made dinner. Or lunch. Or snack. 

Empanadas with Beans & Greens
makes about a dozen 6″ pastries

3-4 garlic scapes, chopped (or 1-2 garlic cloves)
2 c cooked beans (pinto, black, navy–whatever you like)
1 large bunch/head of greens (escarole, spinach, chard, etc.), chopped
2 Tbsp vermouth (optional)
olive oil
salt & pepper
1 egg (for egg wash)

Make the empanada dough (or purchase pre-made dough) and let it chill while you’re preparing the filling.

Heat a pot with the olive oil over medium-low heat. Add the garlic and when it’s starting to get fragrant, add the beans, with a little of their cooking liquid if you have it, or some water if you don’t. Cook, stirring occasionally, until they’re heated through. Add the chopped greens, a little more water, and the vermouth. Season with salt, and stir. Cover and cook, stirring occasionally, until the greens are wilted. Uncover and keep cooking until any excess liquid has mostly boiled off.

Preheat the oven to 400F. 

Mix the egg with a tablespoon of water. Roll out the dough as thin as you can make it, and cut it into 6″ circles. Put a big spoonful of the filling onto each circle, and brush the egg wash onto the rest of the circle. Fold each one over and crimp very firmly with the tines of a fork. Place the empanadas onto a baking sheet and bake for 10 minutes. Turn them over and bake another 5. Remove from the oven and place on a baking rack until they’re cool enough to eat, or to freeze. 

To reheat, wrap in foil and heat for 10 minutes in a 400F oven.

Cook Club 2

[Guest post from M.]

L. has graciously allowed me to post a story to her blog about our most recent cook club.  As regular readers of this blog know, a few months ago, L. gathered a group of us with the idea of having regular supper parties.  There are four of us, and we take turns hosting.  Whoever hosts is in charge of all the food.  The other three bring guests and drinks.  L. hosted our first dinner party, which you can read about here.

Sunday night, it was my turn.  Those of you in the New York area know that this past weekend was sweltering.  Disgustingly hot.  All I wanted to do was lay in my air-conditioned bedroom and dream of winter snows.  It felt like we were in Alabama, and as luck would have it, I had planned a menu of southern food from The Lee Bros. Southern Cookbook.  Even more lucky, I had done some of the baking the day before, and two of the main dishes were salads.  Regardless, by the end of the evening, my kitchen felt like a sauna.

So, on to the important things.  We started off with cheese straws (recipe from Mark Bittman; I don’t have a large food processor, and the Lee Bros’ recipe was a bit too reliant upon the food processor for me to feel as though I could adapt it reliably to my food-processor-less kitchen) and deviled eggs (recipe from the Lee Bros.).  I also had a big pitcher of sweet tea, and L. brought a pitcher of unsweetened white jasmine iced tea.  Delish!  I even dug out my grandmother’s hand-crocheted table-cloth for an added Southern touch (am I the only one who associates tablecloths with the South?  We never used them growing up — they seem most at home on a table tied to traditional ways).

Media_httpfarm5static_vccci

After everyone had arrived and had had time to cool off with iced tea or wine, I started the grits.  I had planned originally to make grits with blue cheese, but with the weather, I thought the cheese might make them unnecessarily heavy.  I had already made the collards — vegetarian, but cooked in a smoky tomato onion sauce that gave them a nice traditional flavor — so I just heated those up as the grits cooked.  I had also prepared the two salads before my guests arrived — a succotash made of corn, cranberry beans, tomatoes, yellow squash, and basil;

Media_httpfarm5static_bzdcv

and a “new ambrosia” made with grapefruit, oranges, avocados, celery, and cucumber — so C. tossed them with their dressings while I cooked. 

Media_httpfarm5static_cvmdp

The recipe for the ambrosia is available online here.

Media_httpfarm5static_jjopw

I was most fond of the collards and grits, but I thought all the dishes turned out well.  It was nice, in this heat, to have cool dishes and to avoid the heaviness that comes with meals featuring too much dairy or meat.  Next time, I think I’d use less dressing on each of the salads, and I think I would de-seed the tomatoes before adding them to the succotash. 

But, of course, the most important part of any meal is dessert.

I had cooked a buttermilk pound cake the day before.  It was my first attempt at making a pound cake, and it turned out beautifully.  I’m still slightly traumatized by the amount of butter that went into it, but the results were divine.  I topped the cake with some plain whipped cream, a sauce made from blueberries that I had picked in New Jersey the weekend before, and fresh blueberries (sadly, not fresh picked). 

Media_httpfarm5static_xjecj

So, all in all, a lovely dinner with old friends and new.  We survived the heat and proved that a vegetarian southern feast is not an oxymoron.

Beans, Beans, They’re Good for the Soup

Several years ago, I took a greenmarket cooking class at the Institute of Culinary Education here in New York. The class met at the Union Square greenmarket and basically just bought what looked interesting, what was in season, what we’d never tried before. Then we brought it all back to the kitchens and made a big lunch. One of the things we made (it was July) was this vegan corn chowder with cranberry beans and some kind of leafy green. This is not that chowder. But it is a soup, with cranberry beans (I think) and potatoes and a leafy green (kale).

Here are the aforementioned beans. They’re quite pretty, although I am always sad that cranberry beans lose their beautiful speckles when you cook them. They look like they might have been the inspiration for certain flavors of Jelly Bellies.

Media_http2bpblogspot_ecird

Here they are en masse (they didn’t need to go in the pot yet, I just liked the way they looked).

Media_http2bpblogspot_cshfl

I am told that recently dried beans (as opposed to beans that have been sitting in the supermarket for months on end) do not really need to be soaked, and will only take an hour or so to cook. This recipe assumes that starting point.

So after rinsing the beans and tossing away the few that had (sadly) gotten a bit moldy while the pods were drying, heat some oil in a big pot.

Media_http1bpblogspot_xekki

Add some onion and saute until it starts to brown, then add the beans. Cover with a few cups of water, enough so there’s at least an inch or two on top of the beans, and bring to a simmer. Cook for maybe 45 minutes, adding whatever herbs you think will work–I tossed in a bay leaf, a few sprigs of summer savory, and a few inches of fresh rosemary (yay windowbox!). Add more water as needed if it starts to get low.

Media_http1bpblogspot_ylefc

After about 45 minutes, check on the beans. They should be starting to get soft, but not fully tender yet. Add in some diced potatoes, and more water if necessary, and a bunch of salt. Give it another 10-15 minutes, and then check on both the beans and the potatoes. They should both be just about the right texture for eating, at which point you dump in a couple of big handfuls of leafy greens (stems removed).

Media_http1bpblogspot_lpbpo

Stir it all up, taste for salt, crank in some pepper, and call it a day. Oh, and you might want to remove the bay leaf and the stems from the other herbs if you happen to think of it…

It should be noted that although these recently dried beans did not require soaking, it was maybe not the smartest thing to assume I’d be having soup for dinner. It turned out that I got hungry before it was ready, and had an omelet instead (cheddar and apple). But it has been a great lunch all week.

Maybe when it’s corn season again I’ll try to reconstruct the chowder from that ICE class…

Paid Content

This week has been rather trying in ways that have nothing to do with food, hence the paucity of new posts. This week also found me cooking collards again, though I think I’ve found a good way to do it now, courtesy of Cook’s Illustrated. I have been on their email list for years, getting both the letters from Vermont from Christopher Kimball and the bits of often useful info from America’s Test Kitchen, but I have never subscribed to the magazine nor paid for access to the site. For some reason, I decided this was the week to do just that–pay for site access, that is. (I do not need another magazine coming into my apartment.)

I first learned about Cook’s Illustrated when I did the Columbia Publishing Course. I think it was Kimball himself who came and talked to us about their business model, which is ad-free (though not sponsor-free) and dependent heavily on subscribers. It’s basically Consumer Reports for cooks, a repository of ingredient and equipment reviews, as well as thoroughly tested recipes. Just the place to find the best way to cook collards, right?

They have several variations on Quick Cooked Greens, but the one that jumped out at me was With White Beans and Rosemary (possibly because I still had some cooked pinto beans in the fridge and the rosemary in my windowbox is doing great…).

So. Assuming you have cooked beans already (or canned, whatever), the first thing is to stem the collards and chop them coarsely.

Media_http1bpblogspot_cecaf

Cook them in boiling salted water for about 7 minutes, just until tender (I went a little longer). Drain them, and dunk them in cold water, then drain again and squeeze out as much water as you can. Then chop a bit more.

Then, take your slivered garlic, chopped rosemary, and a little red pepper flakes and heat them in a wide skillet in olive oil. NB: do not start this while you’re still dealing with the greens unless you especially like burnt garlic, because it goes from golden brown to blackened much faster than you think.

Media_http1bpblogspot_hyxgf

Add the greens and stir it all up, then add the beans and either some cooking liquid from the beans if you were smart enough to save it, or some kind of stock, or just water. Simmer, cover, and cook about 5 minutes. Season with salt (it’s going to need it), and serve with shaved parmesan.

Media_http3bpblogspot_xfbci

Other variations, for interested parties, include With Bacon and Black-Eyed Peas, With Black Olives and Lemon Zest, and With Penne and Prosciutto. I might actually find myself excited to get collards again.

Mole Is Never Ready for Its Close-Up

My friend S. discovered, probably before anyone else did, that all you have to do to get me to cook for you is send me a link to a good food blog with pretty pictures and say “mmmm…” I think the deciding factor in that case was an apple cake recipe from 101 Cookbooks, which served the secondary purpose of introducing me to a great recipe source. Sometime last fall, I adapted her recipe for Borlotti Bean Mole with Roast Winter Squash, which I made again this week. I can’t say it’s a very pretty meal, and I also can’t say how authentic this version is, but I can say that it is worth the time it takes to prepare.

Mole is that rare food that I love and am capable of making but yet am never confident in preparing. It is such an odd combination of ingredients that I never trust they will all meld together into the rich, spicy, theobromic goodness that I love so much. But this version is a good ‘un, a keeper if you will, and it’s what I made last night. The thing I forgot from making it the first time is that it takes a loooong time to make. Not difficult work, but this is not really designed to be a weeknight dinner.

Start with some winter squash (delicata here), or alternately sweet potato, in bite-sized cubes. Roast in olive oil until it’s just barely tender.

Media_http2bpblogspot_hxghx

You’ll also need some chard (kale works, too). Not a whole bunch, though.

Media_http1bpblogspot_xzjfw

While the squash is cooking, caramelize some onion and hot peppers in butter. This takes time, at least 20 minutes, ideally 30, over medium-low heat. I generally do not caramelize onions, ever, because I don’t have the patience for it, as much as I like the flavor.

Media_http1bpblogspot_davje

Add some minced garlic, then a can of tomatoes and some paprika, and simmer 10-15 minutes.

Media_http4bpblogspot_bfahi

Then here is where it gets weird. Or not weird. It’s just how you make a mole. Add almond butter and cocoa powder, and stir it up to sort of let it all melt in.

Media_http1bpblogspot_uflfc

Then in goes that squash you roasted, plus a couple of cups of pinto beans (or cranberry beans), and the chard leaves, cut into wide strips. Stir it up, cover, and stick it in the oven for a good 2 hours at 250F. You can get away with less time if you omit the stems of the chard, but the longer the better, really.

Meanwhile, since you don’t have anything better to do, and you’re not eating for 2 hours anyway, cook up a pot of polenta. If you’re feeling ambitious, pour it into a baking dish and let it set up so you can cut it into funny shapes. (Round is funny, right?)

Media_http4bpblogspot_yzbzs

Then, 2 hours later, here comes the mole!

Media_http1bpblogspot_fwkhr

Serve on top of the polenta.

Media_http3bpblogspot_mjjqo

It is a singularly unattractive dish. It looks like any number of things you don’t ever want to think about eating, and since you know what went in it, it’s understandable if you’re hesitant. But give it a go. It’s very rich, very hearty, and delicious.

Winging It

K. and A. came over for dinner Monday night. I know that conventional wisdom dictates against trying out new recipes when you have guests, but I’m not a terribly conventional person.

Our first course (not pictured) was cold borscht, from A Platter of Figs, seasoned with cloves, coriander, bay leaf, and cayenne, and then finished with yogurt. I had never made borscht before (not entirely sure I’d even eaten it before), but I trust David Tanis kind of inherently by now. The beets I had were chioggas, which have the benefit of not staining everything in sight purple, an especially useful trait when they need to go in the blender. But the soup winds up not being the striking deep red that it would otherwise be. And I didn’t get the garlic chives I wanted to sprinkle on top. Hence no photo.

Our second course was stuffed peppers. In this case, not only is it a dish I hadn’t made, but I was flying without a proverbial net. I had those gorgeous purple peppers to start with, and then I basically looked in my fridge, freezer, and pantry, and tossed a bunch of stuff together. The stuffing I wound up with was royal quinoa and white northern beans, with a little onion, a hot pepper, grated parmesan, and summer savory.

Media_http2bpblogspot_zmvhw

Then for dessert, I followed Gourmet‘s recipe for plum clafoutis. This is one where I just suddenly decided on Monday that clafoutis was a great word, and that I absolutely had to make it. I thought it was going to be apricot but when I got to the greenmarket at lunch, I inferred that apricot season is over, but plum season is at its peak. So I got a couple of pounds of what are called Italian prune plums. I subbed in sweet Marsala for the brandy, and halved the plums rather than cutting them in eighths. But I think I can say that it was a total success.

Media_http2bpblogspot_hgmem

I think I’ve accidentally memorized the recipe for clafoutis, which is only bad because I can see myself making it all the time. Which would maybe not be a bad thing…

Stuffed Peppers

5-6 bell peppers
1 c. quinoa
2 c. cooked white beans
1/2 onion, diced
1 hot pepper, minced
1 Tbsp summer savory, minced (alternately, 1 tsp. thyme)
2 Tbsp grated parmesan
olive oil
salt

Rinse the quinoa, and put it in a hot sauce pan over medium heat. Stir until the grains are almost dry and smell slightly nutty. Pour 2 1/2 c. water on top, add 1/2 tsp salt, and bring to a boil. Lower the heat and simmer for 20 minutes. Check to see that it’s cooked through, and drain off any excess water.

Meanwhile, cut out the stems and cores of the peppers. Place in a baking dish and roast at 375F for 10-15 minutes.

Pour a little olive oil in a hot sauce pan (you can use the same one the quinoa cooked in if you’ve already drained the grains) and add the onion and hot pepper. Cook for a few minutes, until the onions are starting to brown, then add the beans and the fresh herbs. Stir until the beans are heated through, then turn off the heat. Mix in the quinoa and the grated parmesan. Taste for seasoning, and add more olive oil if it seems dry.

Spoon this mixture into the par-baked peppers, and stick them back into the oven for 20 minutes.

Things I Never Ate as a Child

Growing up, we did not eat eggplant. I think my dad didn’t like it, and much like my mom’s distaste for beans, that preference was one of the deciding factors of our dinner menu. Then there were the foods that just didn’t cross anyone’s minds to cook, like Swiss chard. As an adult, I’ve explored the produce panorama pretty extensively, and discovered that I really love a lot of these things. In searching for a vegetarian lasagne recipe earlier this year, for example, I found one from Deborah Madison that is made with Swiss chard and eggplant, and it is absolutely delicious. Her note in the margin of the cookbook talks about how that particular combination brings out a synergistic depth of flavor in the dish, and I couldn’t agree more.

This week’s delivery included a couple of eggplants and a big bunch of chard. But it’s July. And it might well be unseasonably cool in New York City, but I’m not making lasagne. (I already baked zucchini bread today, this time with cashews and cocoa nibs, and that was quite enough use of the oven, thank you very much.) So I decided to adapt a recipe I found on Not Eating Out in New York.

First, though, a cucumber salad. This is something I ate a LOT of as a kid, because I didn’t care for lettuce, and it was an easy way for my mom to get some raw vegetables into my stomach. Our family recipe was impossibly simple–peeled cukes sliced thin on a mandoline, tossed with olive oil, red wine vinegar, a little salt and sugar, and sometimes some chopped tomato. Tonight I got fancy.

Media_http3bpblogspot_icofq

I had 2 slicing cucumbers, and 2 heirlooms of a variety called Boothby blonde. I took one of each.

Media_http2bpblogspot_ecbea

Many recipes advise that you remove the seeds from your cucumbers (a spoon works well), but personally, I like the flavor with the seeds. So they stayed.

Media_http4bpblogspot_azayy

The recipe was another from David Tanis’s A Platter of Figs, and it might not have been a culinary match for the eggplant dish I was planning, but it sounded good. Mix the cuke slices with some julienned ginger, a little salt and pepper, some fish sauce, and some brown sugar. Let it sit while you dice up a hot pepper of your choosing (this is a Holland chile).

Media_http1bpblogspot_hlcgd

Toss in the pepper and squeeze over some lime juice.

Media_http4bpblogspot_decyp

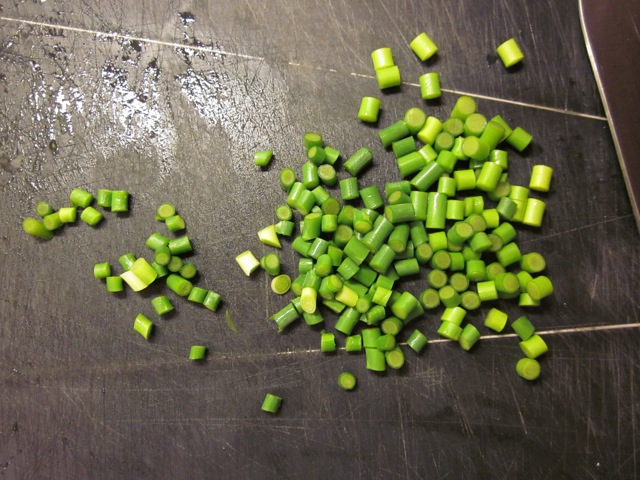
Then cover and stick in the fridge until dinner is ready. In my experience, cucumber salad tastes better the longer you let it marinate. When you’re ready to serve it, toss in some chopped mint and basil and scallions.

Media_http1bpblogspot_huryg

And now, moving on to the real thing. And let me tell you, this is a recipe that’s going in the permanent repertoire. It’s one of those meals where I had to force myself to put the leftovers away before I served myself a third plate.

Start off with some eggplant. Any variety will do, though not the little baby ones.

Media_http3bpblogspot_tayzw

Slice them about 1/2″ thick, sprinkle some salt over them, and let them sit a bit while you mix up the breadcrumbs.

Media_http3bpblogspot_qpnge

I suppose you could use pre-seasoned breadcrumbs, but where’s the fun in that? So mix together some plain breadcrumbs with salt, pepper, and some chopped fresh herbs–thyme and savory worked beautifully, but rosemary would be great, and probably oregano, too. Or parsley. Hard to go wrong, really.

Media_http3bpblogspot_mrkzx

Cook the slices in olive oil, not much more than a minute each side. (I won’t admit how much olive oil I went through tonight, although I will say that I’m glad I hunted for regular as opposed to extra virgin. The smoke point is much higher.)

Media_http1bpblogspot_gffij

Set the eggplant aside and turn to the chard. You could do this step first, but that involves thinking ahead. Separate the stems from the leaves, and dice the stems as finely as you have patience to do.

Media_http1bpblogspot_ddlyv

Chop the leaves very roughly.

Media_http3bpblogspot_hlpya

Cook the stem bits for a few minutes, and then add some sliced garlic cloves and white beans.

Media_http2bpblogspot_eicgx

Once they chard is mostly tender and the beans are warmed through, add the leaves, stir, and cover. Stir a couple more times over the course of a few minutes, and you’re ready to go. The original recipe called for chopping up some capers and some sundried tomatoes as a garnish, which is perfectly nice but almost unnecessary.

Media_http1bpblogspot_oimia

Media_http3bpblogspot_mesjc

In retrospect, a spicy Asian cucumber salad with a breaded Italian dish pairing is not the most, um, cohesive pairing. But both were delicious.

Media_http3bpblogspot_qbtlt

Eggplant Schnitzel with Swiss Chard and White Beans

2 eggplants (about 1 lb), sliced lengthwise, 1/2″ thick
3/4 cup breadcrumbs
1 tsp chopped fresh herbs (e.g. thyme, rosemary, oregano, savory, parsley)
1/2 tsp salt
pepper to taste
1 bunch Swiss chard, about 3/4 lb, leaves chopped coarsely, stems diced
2 c white beans
2 cloves garlic, sliced

1-2 teaspoons finely chopped sundried tomatoes
1 teaspoon capers, coarsely chopped
lots of olive oil

Sprinkle eggplant slices with salt and let sit. Mix breadcrumbs with salt, pepper, and herbs. Pat eggplant slices dry, and then dredge in breadcrumbs to coat each side. Cook in olive oil over medium heat, 1-2 minutes per side, until just cooked through and lightly golden. Remove to a plate and set aside.

Wipe any remaining breadcrumbs out of the pan and add some more olive oil. Raise the heat to medium-high and toss in the diced chard stems. Cook 4-5 minutes, until just tender, then add beans and garlic slivers. Cook 2-3 minutes, until beans are warmed through and chard is mostly cooked, then add chard leaves and stir. Cover, checking and stirring every few minutes until the leaves are cooked to your liking.

Serve eggplant slices over the bean/chard mixture, and garnish with the capers and sundried tomatoes.

The Importance of a Sinkful of Cold Water

So the thing about getting your veggies from an organic farm–instead of, say, your average supermarket–is that they tend to be very dirty. Therefore, a sinkful of water is your best friend. Though I admit that I was surprised at how much dirt there was inside this relatively tightly packed head of radicchio.

Media_http3bpblogspot_cdfyq


The recipe for tonight’s dinner was courtesy of the veggie “tip sheet” distributed by the CSA. Start off with some garlic and rosemary (yay windowbox!)

Media_http3bpblogspot_lracc

Cook in some oil over low heat

Media_http2bpblogspot_gdtjh

add some beans & vinegar

Media_http2bpblogspot_hibne

and toss together with the radicchio, some red onion, and shaved parmesan

Media_http2bpblogspot_ikixx

Serve with some good bread, and in this case, a few rat tail radishes cuz they’re just so cool looking.

Media_http2bpblogspot_wldpb

Incidentally, do you know what does not photograph well? The process of baking zucchini bread. Doesn’t matter, though, because it still tastes good (thanks, Williams-Sonoma!).

Media_http2bpblogspot_hjdjb

Also difficult to photograph? Anything stir-fried. Like Sweet and Sour Cabbage with Tofu and Grains. (not pictured, but very good, especially with a little Chili Garlic Sauce.)

Catching up — weeks #1-3

Lemon Balm (week #2) Syrup

Media_http4bpblogspot_jjhad

1 1/2 c. water
1 1/2 c. sugar
1 bunch lemon balm

put all ingredients in a sauce pan over medium-high heat. bring to a boil, then lower heat and simmer for 15 minutes. turn off heat and steep an additional 15 minutes. strain. chill.

Lemon Balm Martinis

2 Tbsp. lemon balm syrup
4-5 Tbsp. vodka

mix over ice. pour into chilled glass. serve with a lemon twist.

garlic scapes (weeks #2 & #3)

Media_http1bpblogspot_igjob

White Bean and Garlic Scapes Dip

Media_http4bpblogspot_bebig

courtesy of the New York Times

Penne with Bright Lights Swiss Chard (week #3), Garlic, and White Beans

Media_http2bpblogspot_fphwd

adapted from Gourmet

Summer Spinach (weeks #2 and #3) with Chickpeas

Media_http4bpblogspot_acbmm

courtesy of Madhur Jaffrey in Saveur
cool collapsible tupperware courtesy of my sister, Lindsay